Log in to AWS Management Console.
In All services, find and select EC2.
Click the Instances drop-down on the left and select Instances.
Note
If you deploy the Fabric Server instances in the cluster mode, you must stop the source/destination check. To stop the source/destination check:
Right-click the Fabric Server instance and select Networking >> Change source/destination check.
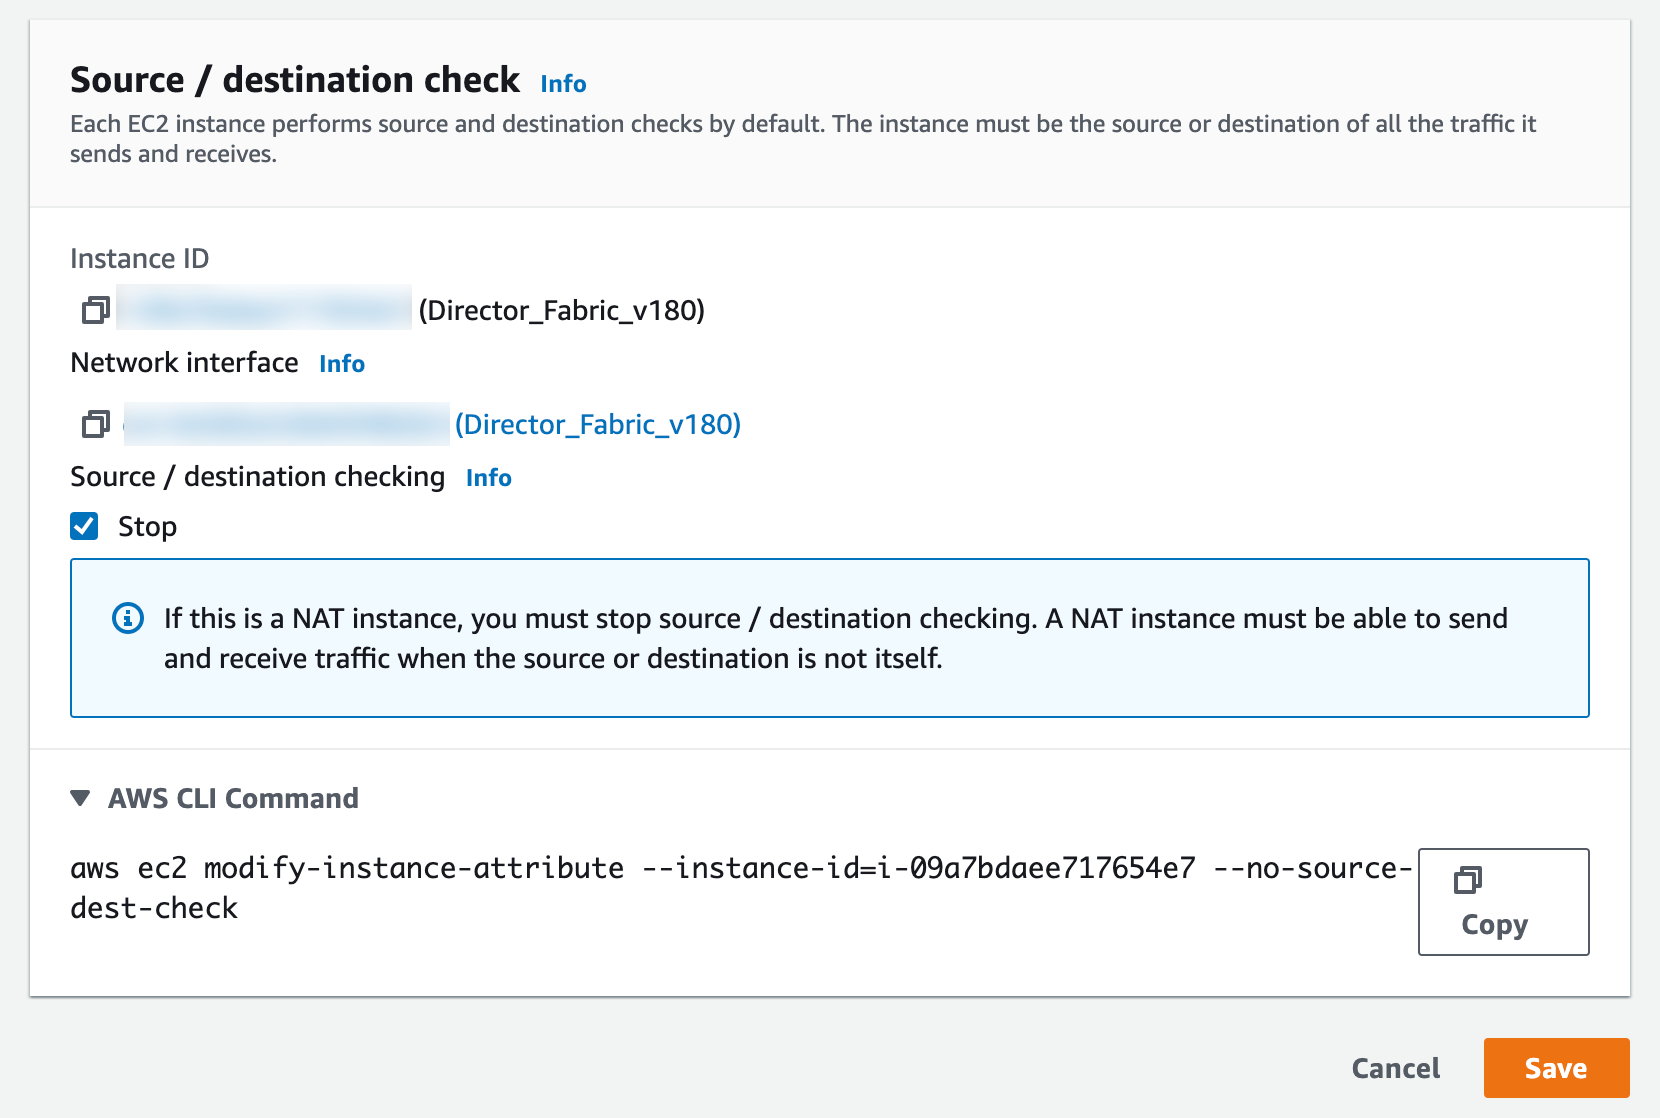
Stopping Source/Destination Check
Select Stop and click Save.
Select the Fabric Server instance and note the IPv4 address (Public IPv4 address or the Private IPv4 address) used in the security groups.
Open the command prompt in your local machine and browse to the folder where you have downloaded the key pair.
Execute the following command:
chmod 400 <filename>
Example:
chmod 400 DirectorFabricV1.8.0.pem
Establish an SSH connection with the Fabric Server using the following command:
ssh -i "<filename>" cmdr-admin@<Fabric_Server_IP>
Example:
ssh -i "DirectorFabricV1.8.0.pem" cmdr-admin@10.10.99.11
Note
If you are deploying the Fabric Server AMI in the cluster mode or scaling the Fabric Server instances, you must create a route table. A route table ensures the network traffic is directed correctly. To learn how, go to Creating a Route Table.
To learn how to install the Fabric Server instance in standalone or cluster modes, go to the Installation of Fabric Server section.
Log in to the Fabric Server Console.
Execute the ifconfig tun0 command.
Note the value of the inet addr parameter. You need this value to know the Fabric Server’s tunnel network address.
Calculate the tunnel network address using the value of inet addr - change the last octate of inet addr to 0 and set the subnet mask to 24.
Example:
inet addr: 10.57.3.1
Tunnel network address: 10.57.3.0/24
Log in to AWS Management Console.
In All services, find and select EC2.
Click the Instances drop-down on the left and select Instances.
Click the Instance ID of your instance.
Click the VPC ID.
Note
Your route table and the Fabric Server instances must be in the same VPC.
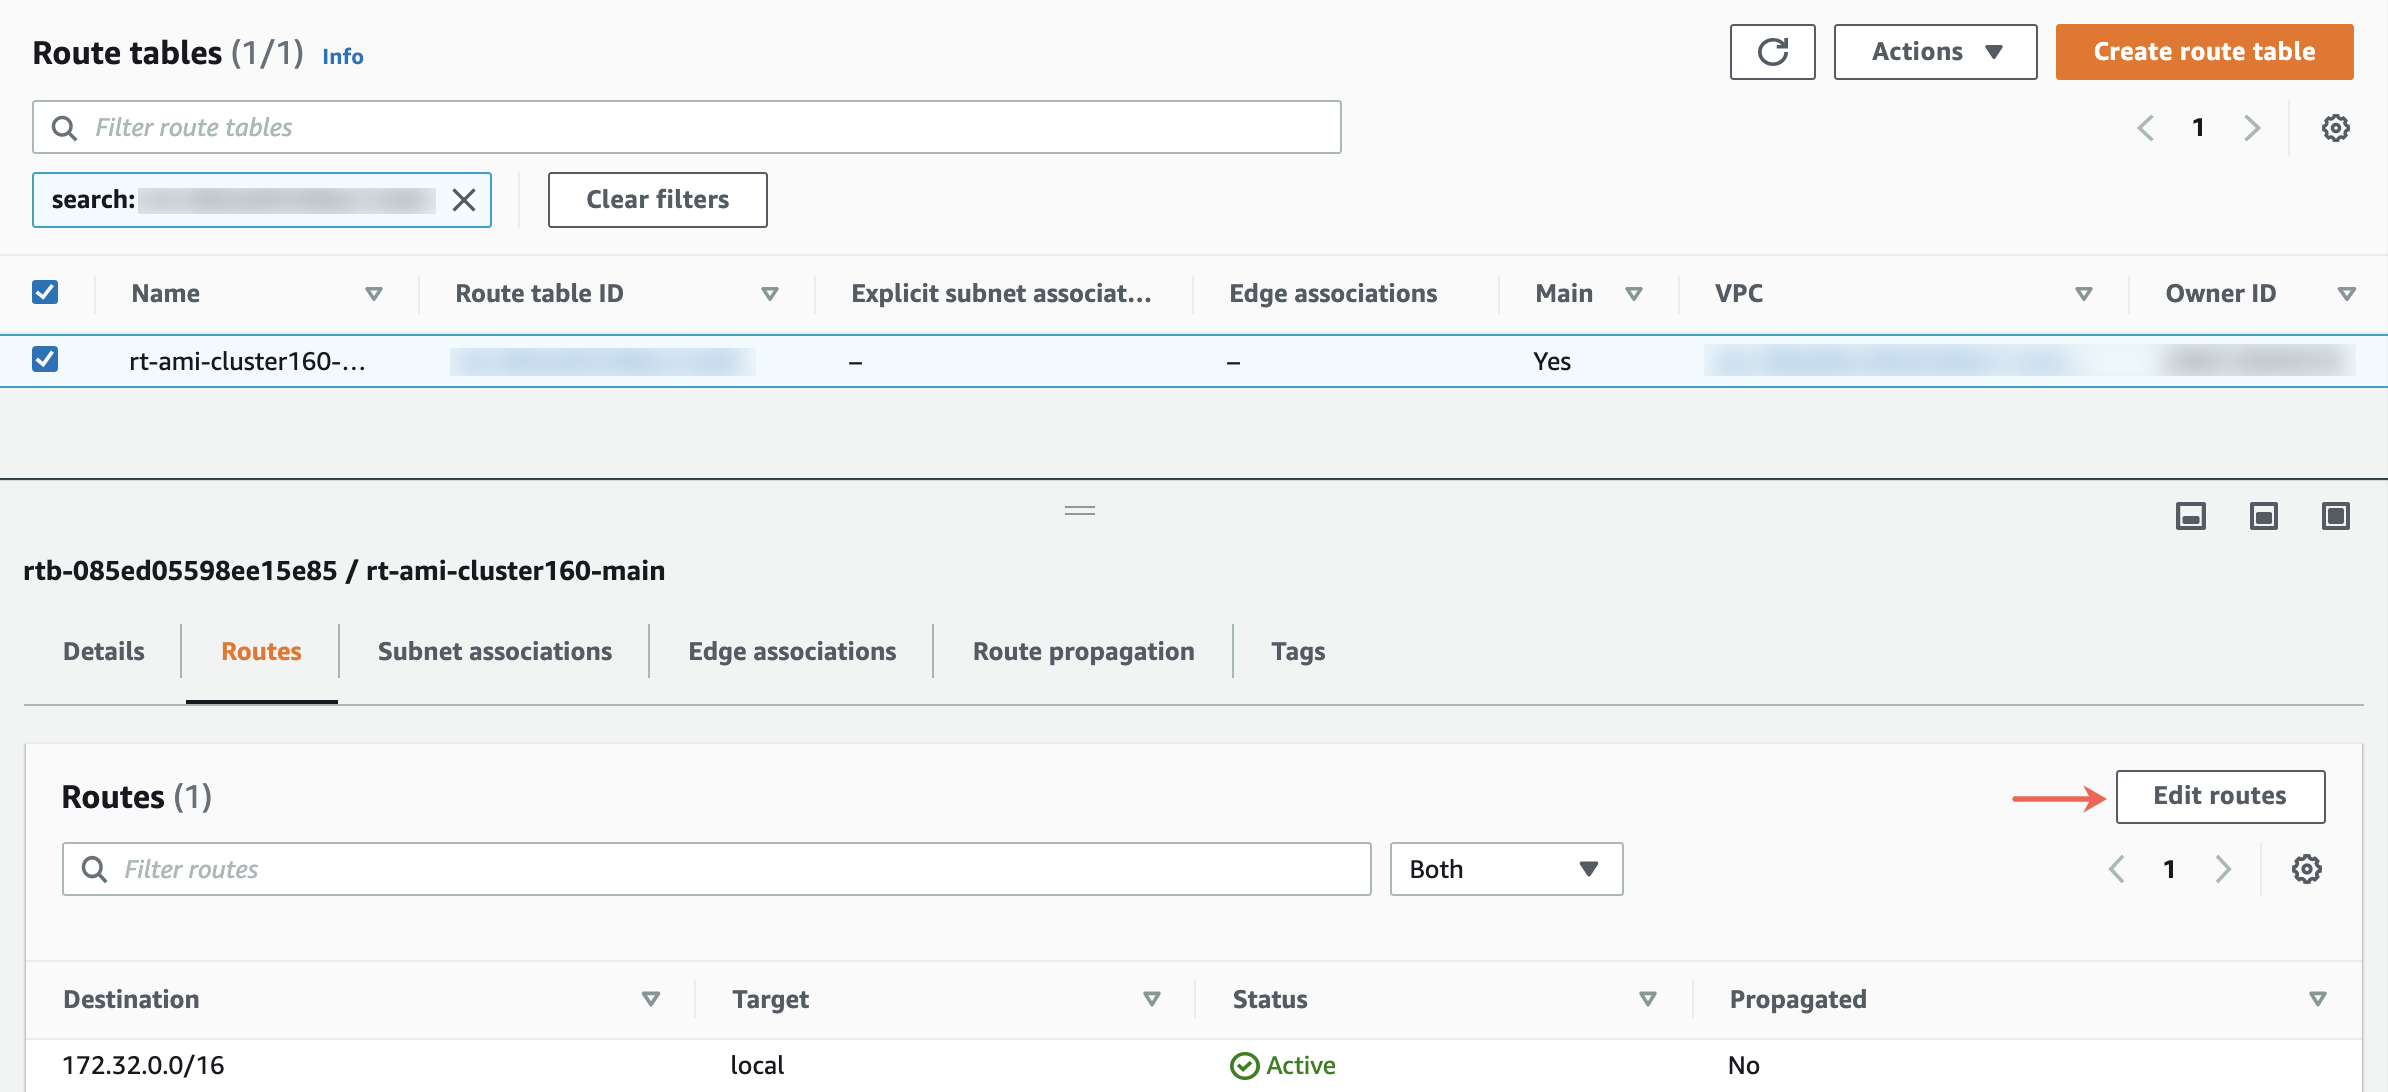
Find the Main route table column and click the route table ID.

Finding the Route Table
Click the Routes tab and click Edit routes.
Editing the Route Table
Click Add route to add a new route.
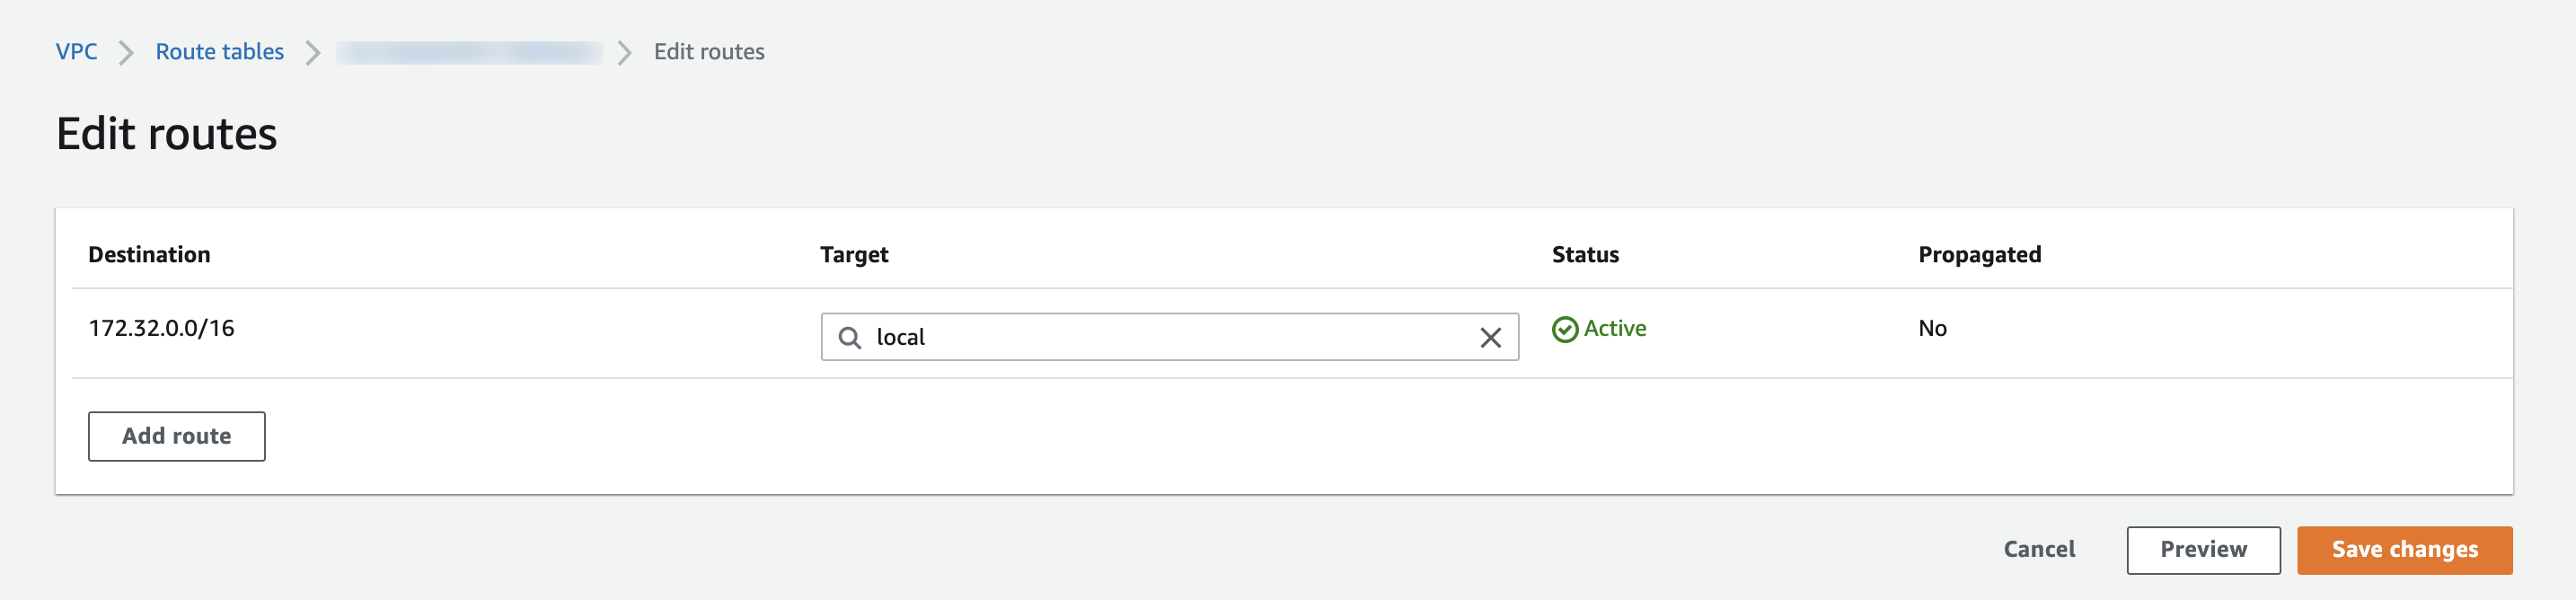
Adding a New Route
Enter a Fabric Server instance’s tunnel network address as the Destination and its instance ID as the Target.
Click Save changes.
Deploy the Fabric Server instance and install the Fabric applications before accessing the API Server instance. To learn how, see the Installation of Fabric Server section.
Log in to AWS Management Console.
In All Services, find and select EC2.
In Instances, select Instances.
Select the API Server instance and note the IPv4 address (Public IPv4 address or the Private IPv4 address) used in the security groups.
Open the command prompt in your local machine and browse to the folder where you have downloaded the key pair.
Execute the following command:
chmod 400 <filename>
Example:
chmod 400 APIServerV1.8.0.pem
Establish an SSH connection with the API Server using the following command:
ssh -i "<filename>" cmdr-admin@<API_Server_IP>
Example:
ssh -i "APIServerV1.8.0.pem" cmdr-admin@10.10.99.11
Note
For details, go to the Installation of API Server section.
Install the API Server before accessing Director Console. For details, go to the Installation of API Server section.
Log in to AWS Management Console.
In All services, find and select EC2.
In Instances, select Instances.
Select the API Server instance and note the IPv4 address (Public IPv4 address or the Private IPv4 address) used in the security groups.
Enter the IPv4 address in your web browser and connect to Director Console.
Example:
https://<IPv4address>
Log in to Director Console using the following credentials:
Username: root

Password: <Instance ID>
We recommend you change the password immediately after the first login.
Upload a Director license. For details, go to the Uploading a Director License section.
Log in to AWS Management Console.
In All services, find and select EC2.
In Instances, select Instances.
Select the LPSM instance and note the IPv4 address (Public IPv4 address or the Private IPv4 address) used in the security groups.
Enter the IPv4 address in your web browser and connect to LPSM.
Example:
https://<IPv4address>
Log in to LPSM using the following credentials:
Username: admin

Password: <Instance ID>
We recommend you change the password immediately after the first login.
Go to System >> System Settings >> General in LPSM and set the IPv4 address of the LPSM instance as its Server Alias.
Warning
Do not use the change-ip command to change LPSM’s IP addresses, gateway, and netmask. AWS environment does not allow these changes after launching the instances.